Proxmox on a server from STRATO
Preparing the server and setting up a VM
As I show you on the Intro Page, there are some points that must be reflected when planning to install a own OS. Here I will try to install a Proxmox which has many specefics because of the way of installation and and the open ports.
The way how Proxmox gets installed
The most OS are published by thier developer as ISO images. After the download is completed it is one way to burn this image onto CD / DVD and start from it. For virtual machine is that useful, because they can use theese file and can also
start from them. To make a installation on a normal PC today the ISO often gets "burned" on a USB stick and it then plugged to a computer and booted from it.
For the Proxmox there is also a ISO file. Linux distributions like Ubuntu, OpenSUSE or Fedora are shiped for the desktop use with a so called "live system". For the server use it is often also without a GUI avialable. There you
have mutiple ways to use them without a installation. Often on such files there is a so called "SquashFS" which is loaded into the RAM and used to boot from.
At the Proxmox image it is a bit more specefic. Also inside of this ISO there is a live environment. But at this time for me it was not clear were the SquashFS is located and how I can unpack it on a disk. Further more is for the Proxmox
installer no textual installation way realized (until Proxmox 7.x).
Normally the installer will just ask the user some major points and then does the installtion in a fixed concept. On the installtion routines from other distors it is possible to make more settings like the partitioning schema, encryption
of volumes or the used file system. These things are missing on the Proxmox installer.
The first challenge is the basic installtion of the Proxmox without any CD / DVD drive, any mouse and any screen. Also a point is that the Proxmox installer will completely repartition the disks. If before that something was on the disk, it
is after that step deleted.
After the completed installtion the Proxmox starts without a GUI and allows the user to use a webfrontend or to connect via SSH. This is in most of all ok for a server which operates on the internet, except that the port 8006 should not be
world open. For SSH here we have the same thing but for it here some approvements can be done. Because of the normal installation way and the open ports it is not easy to do this on a server whch is open to the internet. With having a
server from STRATO then also the missing "KVM" console is a problem.
Easier way to do the installation and expected problems
There is a easier way, as this one I tried here, to achieve the goal.
The Proxmox bases on a Debian. This means, it is also possible to integrate it in a normal Debian installation. This will also need some manual steps, but they are a bit easier to do.
The benefit: It is possible to just use the Server-Login from STRATO and let the server install a normal Debian which is supported by STRATO and Proxmox. After the finish of the installation process you then just reconfigure the Debian from
STRATO to a Proxmox. The link to the manual will place here.
But I don't have the knowledge about having trouble when going this way. More over then something is installed into the Debian which is not needed. Of cause this can be uninstalled in the end. But I not wanted to carry about it. Maybe then
I have not noticed interdependencies. Further more Proxmox uses own software components which should be installed afterwards. But is then everything like a normal installation?
So I decided for me to want a normal installation, although I knew then I have to carry about the resulting consequences. Incluuding this I got to try out the method to do a installation of a not supported OS. I will here make a
installation at home in a VM and later then move it up to the server at STRATO. This method can be redone for any other OS (x86 preconditioned).
Preparations needed to install a Proxmox on a server at STRATO
- Last version of the install ISO from Proxmox
- It is required to preinstall the server (see below)
- A VM at home and experience with the use
- Experience in the use of SSH and pipes
Initial Setup of the server
Any server, which was deployed by the STRATO data center must at first be initial installed with a image build from STRATO. There is no way around that. So the way is to log in via the Customer Login and then select the server. This will open a new tab with the Server Login, where it is also possible to login
directly if it was setup in a step before.
As in the end I want a Proxmox on the server to be installed and it is based on Debian, it was obvious for me to decide to setup the server as a Debian machine. On the install page you choose on the right side at the Debian logo under the
small box a Debian version to install.
The setting for the requested language setting will be applied to your installation, but will be only for a short time relevant, as you overwrite it soon.
Further you're asked for the wanted partitioning of the disk(s). On this point the selection is also free. Below you have to enter a password. You have to use this password to login into the account "root" via a SSH connection or
on the serial console. You don't have here the possibility to put a SSH public key. It is important that you can login into your server after this installation so you be able to copy some settings which are required.
If you done all inputs you have to check the little checkbox at the bottom and then the installation of the server will be started in background in the data center. Is this process completed you will receive an E-Mail which informs you
about that. HINT: In the moment when the installation is completed their is a SSH server started on the machine which listens to the whole world and allows anyone to login with the password we set in the installation page before. This is
good for us but then also any bad guy can try to connect to our server.
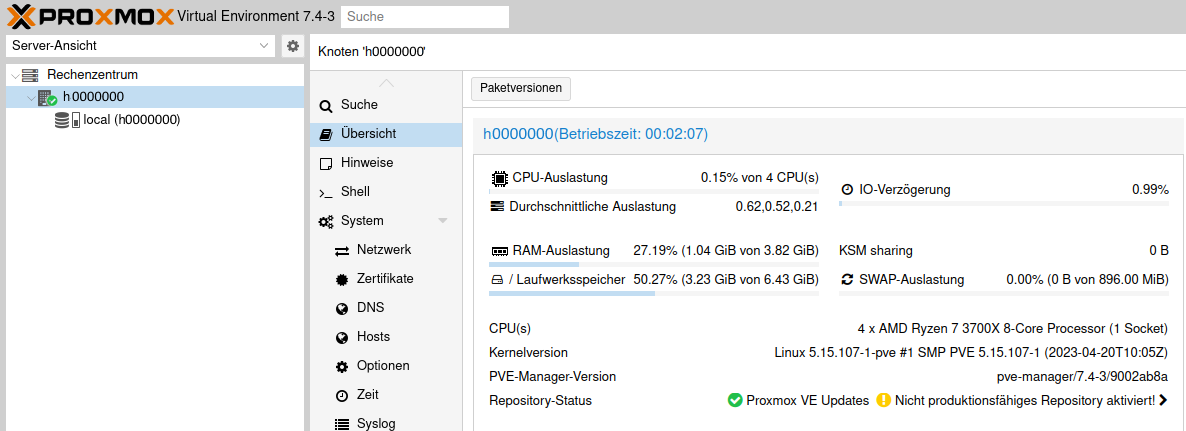
If you are at this step, then your preparation is finished. The installed OS can stay, because you can take some needed configurations from it.
Click image to zoom.
Installing a VM at home
The installation of Proxmox will be done at home in a VM. You understand me correctly, I make a installation of a VM environment "nested" inside a VM. But I do this only to build a "provisioning image" and work on it.
Behalf: As we will do the preparation inside a VM, we are able to take snapshots between the steps. Thus allows us to restore the last state when we had done a mistake.
To create the VM I will here use VirtualBox. It is also possible to use VMware Workstation for it (which you have create / use a account at Broadcom to have access to it).
Preparing VirtualBox
In VirtualBox I made a special virtual network which the provisioning VM will be connected to (Picture 1). The normal "NAT" function, which is setup per machine, will also work for this purpose, but I had planned to put further
machines for testing into the network. The generally use of a NAT network is because I do not like to have this VM in my real network layer. On the one hand that it cannot bind to the space of my real network and on the other hand it cannot
influence my other devices there.
The downside of it is that I need to forward ports to it that I can access it. That ports are that one for SSH and the port for the webfrontend (8006). This is picture 2 showing. And this is near to the reallity were later I have to forward
ports for all may services.
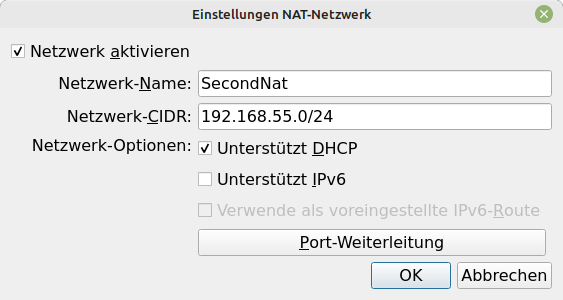
Picture 1: In VirtualBox prepared NAT Network
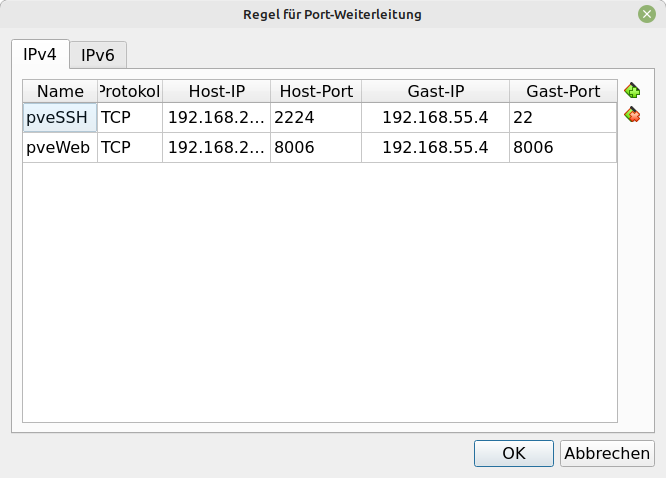
Picture 2: VirtualBox - Port forwaring settings on the NAT network
Having this settings done then after that a VM will be created in VirtualBox. It get 100% CPU at 2 virtual cores. It will get RAM at 4GB which is enough for the prepare step. IMPORTANT: For the size of the primary disk I set 8GB space. The background to do this is that later the disk must be converted and uploaded to the server at STRATO. The size of the resulting partition can later be changed (and this is here part of the plan). The virtual CD drive gets the install ISO of the Proxmox which has to be downloaded before. To the network settings the I set the NAT network of the step before. When anything is finally setup then the VM can be started up and will load from the install ISO the install environment.
Install Proxmox and apply settings
After the VM was started up and the graphical installer is loaded (pve >= 8.0; by choosing Graphical Installer), a installation assistent will be started, which will ask some initial information. Theese information depend on the real use
on the at STRATO but must be changed to the correct values later. At first it is needed to set anything to the settings needed for the VM and later apply the settings for the real server.
Some pages of the assistent are not relevant to discuss here in this szenario, like e.g. the presentation of the licence of Proxmox which must be accepted by a button click. Ohter dialogs are more important here. So I will show them here
with some explainations to the settings.
HINT: The assistent will assume that if something is on the disk, it is not needed and will clean the whole disk!
Disk selection and size
In the picture you see the page of the assistent where you have to select the disk and set the size of the partitioning. The dialog window in front named "Harddisk Options" I got by clicking on the button "Options" at
the bottom and on the right of the disk selection box.
I will be every time right when say that the server at STRATO have multiple of hundred gigabyte space for you. From STRATO you get server with 2xHDD or 2xSSD. These normally have a soft raid level 1 on it. But there are also old exotes
having a old hardware raid controller. This is better when want to use RAIDed disks and Proxmox together, but they are very old and need old drivers. Further exotic servers exist such as my first one, which had 1xSSD and 2xHDD. The OS gets
installed on the SSD and the Harddisks are planned for custom data, like for example VMs.
A other side of this discussion is that in the end the VM must be uploaded to the server. This was the point for me to use just a 8GB disk size. And it will not be a problem, that I have only one disk. But it is also possible, when the
server has just 2 HDDs to also here use 2 disks in the VM. Important is the dialog window opened (see Picture). It is possible to choose ZFS for example at the top, which is recommended when the installation is done on on a soft raid. Very
important is the box at the bottom where I entered a 0. It tells the setup assistant, that it should not plan extra space for placing VMs. This will not make sense when in preparation and then the space will be split in about ~30% root and
the rest of it for LVM-Thin VMs. Then it will probably not work to install. The abandonment of space for Proxmox VMs is only for the prepare step needed.
Language settings and time zone
The Proxmox installation assistent asks you for the language and timezone setting. This means the language is only fixed set for the Linux backend. The language setting will cause that for example chossed german that help texts of applications and manpages are the translated versions in german. When you prever the use of English for language and keyboard map you also can choose English here. The timezone is relevant for the Proxmox host not for the containers / VMs. These can set this for thier needs. The topic computers and timezones is very big. I just choosed for me "Europe/Berlin" as the setting there.
Password and E-Mail
The setup assistant is asking you to enter a e-mail address and a password. These setting are for the Linux user "root" which later can login on the console, via SSH or using the webfrontend. It is later also possible to add more
Linux user and Proxmox internal users. But here meant is just "root".
As the Proxmox can for everyone be reached via the internet the password should be set secure. Apart from this the security settings for SSH will be increased also. This will be explained later.
In this case here the installation is done in a protected environment in a VM. Also it will be needed to often do logins. Here we can at first use a easy password. And then later it is required to change the password. In other words, first
I had set a very easy password and after I made the first login in the webfrontend I changed the password because then I had copy and paste.
I suggest to generate and store the password using a password manager, if no secure password is already in use any were.
The e-mail address is the one were system mails and those of Proxmox processes like the backup will be sent to. Here you can enter your personal mail address from you provider or one got from STRATO services. Entering the local hostname
will invoke that the mails getting supplied to the local server machine.
Primary network (management network)
The assistant now asks you for the primary network settings to manage the Proxmox server. About this topic there are some points to know.
Proxmox will create a virtual "bridge" ("vmbr0") of the settings made here, which in the presetting will transparent passthrough anything like a network switch. The network, where the Proxmox is connected to will see all
containers / VMs transparent. In Linux you will see that the "real interface" will not get the settings, but the bridge will get them.
The server at STRATO often have 2 physical interfaces. One has a routing to the internet, the other can be secondary connected to the "ProNet VLAN", to share a private network connection between some servers hosted in the STRATO
data center. It is a possible idea to use this interface as the management interface.
For the public interface it is only be possible to use the one IP address given from STRATO (IPv4). As my server just have the public interface later I will change the virtual bridge.
As here for preparation the Proxmox gets installed in a virtual machine at home it makes no sense to set the real network setting from the server here. These settings must later be changed when it was transferred to the real server (later
will be shown here). The setup assistant here show IP setting, which it discovered by using DHCP, but it will set this static. The virtual machine just has one network interface. So here at top there is nothing to change. Also there is no
need to change the CIDR (IP+subnet mask), gateway and DNS server. I just changed the FQDN of the server to the full hostname of my server at STRATO. The hostname is listed on the prompt when you connect to the server at STRATO by SSH. But
the FQDN is a bit longer. The best way to get it is to enter cat /etc/hosts on the real server and lookup for the known hostname + rest of the domain. This is then entered in the field from the assistant.
Setup Completition
After all dialogs you have seen before the last display is a summary of the settings done before. Below the shown table there is a checkbox which controls the automatic restarting of the machine when the installation has finished.
After acknowledge this display the installation begins. From this time the disks get cleaned up and new partitioned. The duration of the install is about 5 minutes. After the installation is completed and if nothing was changed on the
checkbox, then the VM will be restarted. The ISO image will then be completely removed from the VM. This is ok here.
After the restart the virtual Proxmox should prompt that you can try to connect to it by using the IP or the FQDN specified during setup. Further more you see a login prompt. It is now possible to enter root and the password (see above) to
test that login is possible.
The port forwarding as shown above also allow the access to the Proxmox through the Webfrontend or using SSH. But a has a hint: You have here two small points to keep in mind. At first that the hostname shown in the virtual screen can not
be used to try to access the virtual system. Because this hostname points to the real server at STRATO. For SSH I had (see Picture 1 above) that on my computer all connects from the port 2224 should be forwarded to
the SSH port of the Proxmox. So you have for SSH connections to enter
ssh -p 2224 root@<Host-Computer-IP>To reach the webfrontend it is possible to use the normal used port 8006, but here I need to use the IP address to enter into the webbrowser of my host computer. Then it should display the weblogin of the Proxmox.
If then you enter "root", further (in both methods) the password, wich you had specified during the setup, you should be logged in to the Proxmox.
When you then reached this step then the first part of the preparation is done. The virtual machine then I shutdown and took a snapshot in VirtualBox. The server at STRATO is needed continuously to copy some settings later.